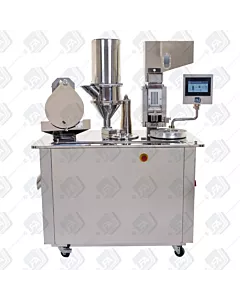
SACF Tooling Change
The SACF semi-automatic capsule filler is able to use all size and types of empty capsules so it’s important to know how to change the tooling in your capsule filling machine.
When tightening the bolts and fittings on the machine we always suggest reading the manual for the recommended tensions.
First, we need to remove the perspex covers from the hoppers. Ensure the capsule closing plate is fully closed to prevent capsules from entering the capsule magazine.
Now remove the 2 bolts either side of the capsule hopper with a 5mm Allen key. Ensure you’re supporting the weight of the hopper when the bolts are removed.
When removing the hopper be very careful not to knock the top of the capsule magazine as it’s very fragile.
Now we’re going to remove the front section of the capsule sewer by removing the 2 bolts with a 5mm Allen key. As removing this ensure you take the weight of the front section as it will fall.
Remove the 2 bolts either side of the teeth section of the capsule sewer, this will allow you to remove it. Place it to one side.
Now we can remove the 2 bolts which will release the back teeth and allow you to remove them.
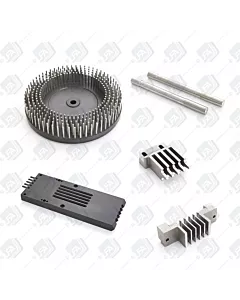
We’re going to remove the tamping section shown here using a 24mm spanner. Undo the nut and washer and then remove the disc.
Now we’re going to place our new tooling into place. First, take your tamping disc and put it onto the thread, replace the washer and 24mm bolt and secure.
Next take the back teeth section, first secure the back teeth with the bolts but only finger tight at first to allow some movement.
Now we’re going to attach the front section of the teeth, place it on gently and the parts are fragile. Secure the bolts, finger tight once again to allow movement. This is to allow us to tune the machine for the capsules.
We now need to adjust the front teeth so they align with the capsule filling plate. Place your capsule filling plate into place. Take your 2 alignment tools which comes with your SACF and slot them into either end of the front teeth and down into the filling plate. You should be able to lift and drop and spin them freely. Now you can tighten the front teeth, do this evenly to ensure correct alignment.
Take 2 empty capsules of the correct size and slot them into either end of the front teeth section. Turn on the machine for one rotation
We need to ensure the larger end of the capsule is inline with the front teeth section. We want it so the front and back teeth are in the correct position without rubbing.
Our back teeth are currently too far forward, so we’re just going to move the back teeth back slightly and retry.
Once the capsules are inline whilst the teeth are at the furthest point forward you can start to tighten the bolts on the back teeth, do this equally as not to push them out of line.
Once complete run the capsule sewing button to ensure the capsules don’t get pushed any further forward.
Now we’re going to place our new capsule magazine into place. First, ensure the machines is at it’s highest point in the rotation.
Place the magazine onto the pins on the machine. Place the 2 bolts into place and tighten finger tight.
Lower the magazine so you can see it’s lined up with the lower teeth. If you’re happy with the alignment, tighten the 2 bolts on the front of the magazine equally.
Let’s test our alignment, place some capsules manually into the top of the magazine filling all the slots.
Turn on the capsule sewer ensuring they drop out equally and are push into the capsule disc. Don’t worry if they’re not fully pushed down as we’re not running the vacuum for this test.
Place the hopper back onto the top, again being careful with the top of the magazine. Place the bolts back into place finger tight. Now tighten equally with your Allen key. Now run your machine for a couple of rotations and listen for any noises such as scraping or metal on metal if you do hear this, stop and realign.
Now open your capsule closing plate and your capsules will flow through your capsule filling machinery.